Choosing the right back brace can make a world of difference, whether you’re dealing with chronic pain, recovering from an injury, or simply needing extra support during workouts or daily activities. But here’s the truth most people don’t talk about: even the best back brace won’t help you if it doesn’t fit correctly.
That’s where proper sizing comes in.
This comprehensive back brace sizing guide will walk you through exactly how to choose the correct size, what measurements matter, how to read sizing charts correctly, and what to avoid (including one big mistake I personally learned the hard way). By the end, you’ll feel confident choosing a brace that actually works and won’t need to be returned.
Why Back Brace Sizing Matters More Than You Think
A back brace isn’t like a T-shirt or pair of stretchy leggings, it’s a medical or therapeutic support device that relies on compression, stability, and positioning to provide relief.
If the brace is too small, it can dig into your skin, restrict breathing, cause circulation issues, and even worsen your posture or pain.
If the brace is too large, it won’t deliver the level of support your back needs. It may slip around, roll up, or simply fail to stabilize your spine, making it basically useless.
A proper fit ensures:
-
Even compression
-
Better alignment support
-
All-day comfort
-
Maximum pain relief
-
Reduced strain during activity
-
Correct engagement of core and back muscles
This is exactly why sizing is step one, not an afterthought.
The Personal Mistake That Made Me Take Sizing Seriously
When I bought my first back brace a few years ago, I thought, “How complicated can this be?” I skimmed the product page, chose the size I thought would fit based on my usual clothing size, and hit checkout.
Big mistake.
The brace arrived, and even fully loosened, it barely wrapped around me. The Velcro wouldn’t meet, the support panels dug into my sides, and I felt like I’d stuffed myself into the world’s tightest compression band. It was so small that I couldn’t even properly test it for support.
I had to return it, frustrated, embarrassed, and annoyed at myself, because I didn’t take 20 seconds to look at the specific measurements listed on the sizing chart.
And that’s the lesson that most people learn only after wasting time and money:
Back brace sizes vary widely between brands. Clothing sizes don’t apply. Measurements are everything.
That experience completely changed the way I shop for supportive gear, and now I never purchase a brace without double-checking the measurements. Trust me, you want to learn from my mistake, not repeat it.
Understanding Back Brace Sizing: What You Really Need to Measure
Every brand is a little different, but most back brace sizing charts rely on one or both of the following:
1. Waist Measurement
This is the most common measurement, but it’s often misunderstood. Back braces typically use the natural waist, which is:
-
Not at the belly button
-
Not where your pants sit
-
And not your hip measurement
Your true waist is located about an inch above the belly button, where your body naturally bends when you lean to the side.
To measure:
-
Stand up straight.
-
Use a soft tape measure.
-
Wrap the tape around your natural waistline.
-
Keep it snug but not tight.
-
Write down the number in inches or centimeters.
If you don't have a measuring tape, use a piece of string and measure it against a ruler afterward.
2. Hip Measurement
Some lower-back and SI joint braces rely on hip circumference instead of waist size. This measurement is taken around the fullest part of your hips.
Again, this varies by brand, so always read the product details carefully.
3. Torso Length (for full-back braces)
If you're buying a brace that covers the thoracic spine or one designed for posture support, you may also need torso measurements.
Most brands will ask for:
-
Measurement from shoulder to waist
-
Measurement from collarbone to hip
-
Height (as a general indicator)
This helps ensure the brace doesn’t ride up, cut into the ribs, or sit too low.
How to Choose the Right Size: Step-by-Step Guide
Here’s a simple, foolproof method to select the correct back brace size every time.
Step 1: Take Fresh Measurements
Don’t rely on old measurements or guesses. Our bodies change, sometimes subtly, sometimes significantly.
Measure:
✔ Natural waist
✔ Hips (if required)
✔ Torso (for posture braces)
Write the numbers down.
Step 2: Check the Product’s Exact Sizing Chart
This is crucial.
One brand’s Large may fit a 32–40" waist, while another’s Large may fit a 38–50" waist. There is no standard.
Before adding to cart:
-
Scroll to the sizing chart
-
Look for the exact range your measurement fits
-
If you're between sizes, check the manufacturer’s recommendation
-
Read customer reviews for fit notes
Step 3: Decide if You Prefer a Snug Fit or a Relaxed Fit
Some people want a tight, compressed feel. Others want gentle, all-day support.
If you’re on the borderline between sizes:
-
Choose down for firmer compression
-
Choose up for extended wear comfort
But only do this if the manufacturer recommends it.
Step 4: Consider Brace Height and Support Panels
High-back braces may not suit short torsos, and low-profile belts may not work for tall individuals.
Check product photos and descriptions for:
-
Panel height
-
Stiffness
-
Flexibility
-
Support zones
Step 5: Review the Return Policy
Even with perfect measuring, sizing misfires happen.
Ensure you buy from a seller that allows:
-
Free returns
-
Easy exchanges
-
Clear instructions
Trust me, you don’t want to get stuck with a brace that doesn’t fit.
Signs You Chose the Right Size
When you put the brace on, it should:
-
Wrap around comfortably without straining
-
Allow the Velcro to fully overlap
-
Sit evenly without rolling or bunching
-
Provide firm but comfortable compression
-
Not restrict breathing
-
Stay in place during movement
-
Feel stable but not suffocating
If it’s painful, overly tight, or constantly shifting, it’s likely the wrong size.
Signs the Brace Is Too Small
A brace is too small if:
-
The Velcro barely meets or doesn’t meet at all
-
It pinches your ribs, hips, or stomach
-
You feel short of breath
-
It causes redness or numbness
-
You can’t wear it for more than a few minutes
If any of these happen, stop wearing it, size up.
Signs the Brace Is Too Large
A brace is too big if:
-
It spins or slides on your torso
-
You cinch it tight and it still feels loose
-
The back panel doesn’t sit flat
-
It bunches or folds around your waist
-
You aren’t getting noticeable support
A loose brace isn’t helping your back, in fact, it may make your posture worse.
Special Sizing Considerations for Different Types of Back Braces
Different styles require different fit considerations:
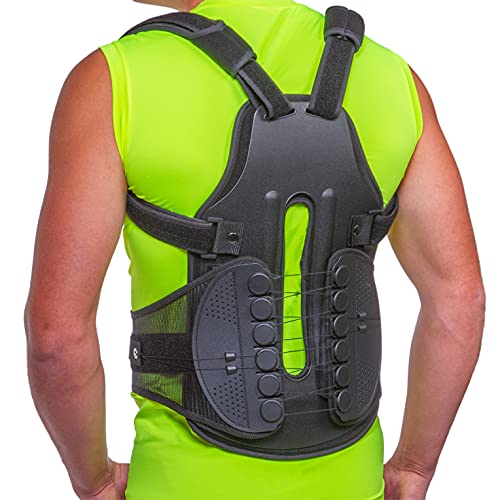
1. Lumbar Support Braces
-
Usually based on waist measurement
-
Should sit between lower ribs and hip bones
-
Snug but not tight
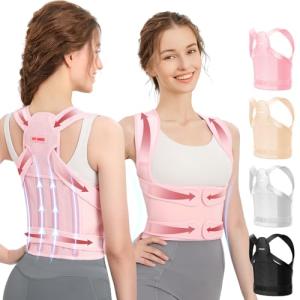
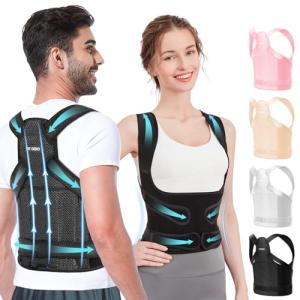
2. Posture Correctors
-
Torso length matters
-
Straps should not dig into shoulders
-
Should align with mid-back, not lower back
3. SI Joint Braces
-
Typically rest lower on the hips
-
Hip measurement is key
-
Must be tight enough not to slide
4. Compression Belts for Workouts
-
Some people size down for maximum compression
-
Breathability and flexibility matter
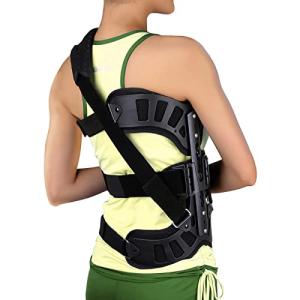
5. Medical-Grade Braces
-
Always follow manufacturer charts
-
When in doubt, consult a provider
What to Do If You’re Between Sizes
This is very common.
If your measurement falls between two sizes:
-
Check the product FAQ, many brands recommend sizing up
-
For firm lumbar support, you may prefer sizing down
-
For posture braces, sizing up reduces shoulder strain
-
For SI joint belts, sizing down often ensures stability
When in doubt, read reviews or choose the one with the best return policy.
Final Tips for Getting the Perfect Fit
To avoid the “too small” mistake I made:
✔ Always measure yourself before buying
✔ Always check the specific sizing guide
✔ Never assume your clothing size matches your brace size
✔ Read reviews from real customers
✔ Recheck measurements if you're losing or gaining weight
✔ Prioritize comfort and support, not vanity sizing
With the right approach, you’ll find a brace that supports your back, relieves pain, and helps you stay active without frustration.